How Captive Portals Work
How Captive Portals Work: Building One from Scratch on Raspberry Pi
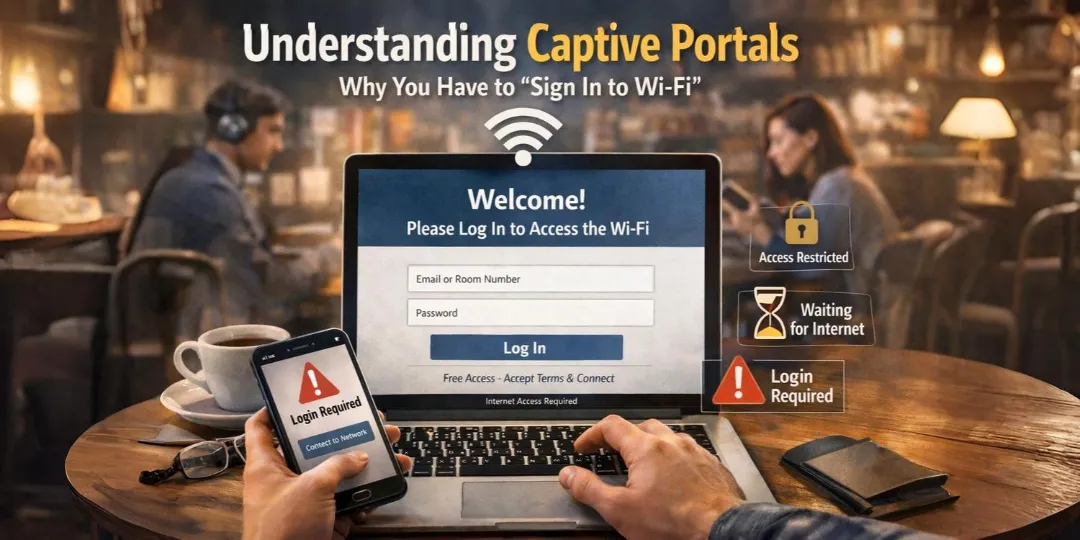
Ever connected to WiFi at a coffee shop and had that "Sign in to network" page magically pop up on your phone? That's a captive portal in action. These clever systems are everywhere—hotels, airports, corporate guest networks—yet most people have no idea how they work.
Today, we're going to demystify captive portals by exploring the technology behind them and building a fully functional one on a Raspberry Pi.
What Exactly Is a Captive Portal?
A captive portal is a web page that appears automatically when you connect to certain WiFi networks. It "captures" your web traffic and redirects you to a specific page before granting internet access. They're used for:
- Authentication - Login before accessing the internet
- Payment - Pay for WiFi access (hotels, airports)
- Terms & Conditions - Accept usage policies
- Information Collection - Email signup, surveys
- Network Configuration - IoT device setup
But here's the interesting part: your device doesn't randomly decide to show you this page. There's a sophisticated detection mechanism at play.
The Invisible Connectivity Check
Your smartphone is constantly testing whether it has "real" internet access. Here's how different operating systems do it:
Android
- Checks:
http://connectivitycheck.gstatic.com/generate_204 - Expects: HTTP 204 (No Content) response
- If different: Shows "Sign in to network" notification
iOS/macOS
- Checks:
http://captive.apple.com/hotspot-detect.html - Expects: HTML page containing the word "Success"
- If different: Opens mini-browser with captive portal
Windows
- Checks:
http://www.msftconnecttest.com/connecttest.txt - Expects: Plain text "Microsoft Connect Test"
- If different: Network icon shows "Action needed"
Firefox
- Checks:
http://detectportal.firefox.com/success.txt - Expects: Text "success"
- If different: Shows notification bar
This is brilliant design: devices know they're on a captive portal network without any special configuration. The network just has to return the "wrong" response.
The Three Pillars of Captive Portal Technology
Building a captive portal requires three key components working together:
1. DNS Hijacking
The portal intercepts all DNS queries and returns its own IP address, regardless of what domain is requested.
# DNS Configuration (dnsmasq)
interface=wlan0
listen-address=192.168.5.1
address=/#/192.168.5.1
When a device asks "What's the IP of google.com?", the DNS server responds "It's 192.168.5.1!" (the portal's address). Same for facebook.com, twitter.com, or any domain. This ensures all HTTP traffic gets directed to the portal.
2. Traffic Redirection
Even if DNS somehow fails, firewall rules forcefully redirect all HTTP/HTTPS traffic:
# Redirect all HTTP traffic to portal
iptables -t nat -A PREROUTING -i wlan0 -p tcp --dport 80 \
  -j DNAT --to-destination 192.168.5.1:80

# Redirect all HTTPS traffic too
iptables -t nat -A PREROUTING -i wlan0 -p tcp --dport 443 \
  -j DNAT --to-destination 192.168.5.1:80
These iptables rules ensure that every web request, no matter how it's made, ends up at the portal server.
3. Platform-Specific Response Handling
The portal server must respond differently based on which OS is checking connectivity:
# For Android's connectivity check
if self.path.startswith('/generate_204'):
    # Android expects 204, give it 302 redirect instead
    self.send_response(302)
    self.send_header('Location', 'http://192.168.5.1/')
    self.end_headers()

# For iOS/macOS
elif self.path.startswith('/hotspot-detect.html'):
    # Return portal HTML instead of "Success"
    self.send_response(200)
    self.send_header('Content-type', 'text/html')
    self.end_headers()
    # Serve portal page

# For Windows
elif self.path.startswith('/connecttest.txt'):
    # Redirect to portal
    self.send_response(302)
    self.send_header('Location', 'http://192.168.5.1/')
    self.end_headers()
Building a Real Captive Portal: A Practical Example
To demonstrate these concepts in action, I built a complete captive portal system for Raspberry Pi. The project turns any Raspberry Pi into a WiFi configuration portal—perfect for headless setup, IoT device provisioning, or learning about network protocols.
GitHub Repository: rpi-wifi-provisioner
What It Does
The system operates in two modes:
Access Point Mode: The Raspberry Pi creates a WiFi network called "RPi-Setup" (open, no password). When devices connect, they're automatically presented with a web interface.
Client Mode: After configuration, the Pi switches to normal WiFi client mode and connects to the network you selected.
The Architecture
Here's how the components work together:
┌─────────────────────────────────────┐
│  Device Connects to "RPi-Setup"     │
│  Gets IP: 192.168.5.100-200         │
└──────────┬──────────────────────────┘
           │
┌──────────▼──────────────────────────┐
│  hostapd                            │
│  Broadcasts WiFi: "RPi-Setup"       │
└──────────┬──────────────────────────┘
           │
┌──────────▼──────────────────────────┐
│  dnsmasq (DHCP + DNS Server)        │
│  • Assigns IP addresses             │
│  • DNS Hijack: ALL → 192.168.5.1    │
└──────────┬──────────────────────────┘
           │
┌──────────▼──────────────────────────┐
│  iptables (Firewall/NAT)            │
│  • Port 80 → Portal Server          │
│  • Port 443 → Portal Server         │
└──────────┬──────────────────────────┘
           │
┌──────────▼──────────────────────────┐
│  Python HTTP Server (portal_server) │
│  • Detects OS connectivity checks   │
│  • Serves configuration interface   │
│  • Scans for WiFi networks          │
│  • Handles connection requests      │
└─────────────────────────────────────┘
Key Implementation Details
DNS Configuration (dnsmasq.conf)
interface=wlan0
listen-address=192.168.5.1
dhcp-range=192.168.5.100,192.168.5.200,24h

# The magic line - wildcard DNS resolution
address=/#/192.168.5.1
This tells dnsmasq to respond to every DNS query with 192.168.5.1, ensuring all traffic gets funneled to the portal.
Access Point Setup (hostapd.conf)
interface=wlan0
driver=nl80211
ssid=RPi-Setup
hw_mode=g
channel=6
ieee80211n=1

# Open network (no password)
auth_algs=1
ignore_broadcast_ssid=0

# To add WPA2 security, uncomment:
# wpa=2
# wpa_key_mgmt=WPA-PSK
# wpa_passphrase=YourPassword
# rsn_pairwise=CCMP
The Portal Server (Python)
The web server handles multiple responsibilities:
1. Captive Portal Detection
def do_GET(self):
    # Android captive portal detection
    if self.path.startswith('/generate_204'):
        self.send_response(302)
        self.send_header('Location', 'http://192.168.5.1/')
        self.send_header('Cache-Control', 'no-cache')
        self.end_headers()

    # Apple captive portal detection
    elif self.path.startswith('/hotspot-detect.html'):
        self.send_response(200)
        self.send_header('Content-type', 'text/html')
        self.send_header('Cache-Control', 'no-cache')
        self.end_headers()
        with open('/var/www/portal/index.html', 'rb') as f:
            self.wfile.write(f.read())

    # Windows captive portal detection
    elif self.path.startswith('/connecttest.txt'):
        self.send_response(302)
        self.send_header('Location', 'http://192.168.5.1/')
        self.send_header('Cache-Control', 'no-cache')
        self.end_headers()
2. WiFi Network Scanning
elif self.path == '/scan':
    # Run WiFi scan
    result = subprocess.run(
        ['sudo', 'iw', 'dev', 'wlan0', 'scan'],
        capture_output=True,
        text=True
    )

    # Parse scan results
    networks = []
    for line in result.stdout.split('\n'):
        if 'SSID:' in line:
            ssid = line.split('SSID:')[1].strip()
            networks.append({
                'ssid': ssid,
                'security': 'OPEN'
            })
        elif 'RSN:' in line or 'WPA:' in line:
            # Mark as secured network
            networks[-1]['security'] = 'SECURED'

    # Return JSON response
    response = {'networks': networks}
    self.wfile.write(json.dumps(response).encode())
3. WiFi Connection Handling
def do_POST(self):
    if self.path == '/connect':
        data = json.loads(self.rfile.read(content_length))
        ssid = data.get('ssid')
        password = data.get('password')
        is_open = data.get('is_open')

        # Call connection script
        if is_open:
            subprocess.Popen([
                '/usr/local/bin/wifi-connect.sh',
                ssid,
                '--open'
            ])
        else:
            subprocess.Popen([
                '/usr/local/bin/wifi-connect.sh',
                ssid,
                password
            ])

        response = {
            'success': True,
            'message': f'Connecting to {ssid}...'
        }
        self.wfile.write(json.dumps(response).encode())
The User Experience Flow
Here's what happens from the user's perspective:
- Discovery: User sees "RPi-Setup" in available WiFi networks
- Connection: Connects to it (no password required)
- Detection: Phone runs connectivity check, gets redirected
- Notification: "Sign in to network" appears automatically
- Portal: User taps notification, web interface opens
- Scan: Interface shows available WiFi networks
- Select: User chooses network and enters password
- Switch: Pi transitions from AP mode to client mode
- Connect: Pi connects to the selected network
- Complete: Portal closes, internet access granted
Technical Challenges & Solutions
Building this system revealed some interesting challenges:
Challenge 1: HTTPS Connectivity Checks
Problem: Modern devices increasingly use HTTPS for connectivity checks (e.g., https://captive.apple.com). You can't intercept HTTPS without certificate errors.
Solution: Redirect HTTPS to HTTP portal. The certificate warning itself triggers the captive portal detection. Additionally, many devices fall back to HTTP checks when HTTPS fails.
Challenge 2: Response Caching
Problem: Browsers cache connectivity check responses. A cached "Success" response breaks future portal detection.
Solution: Aggressive cache-control headers on all responses:
self.send_header('Cache-Control', 'no-cache, no-store, must-revalidate')
self.send_header('Pragma', 'no-cache')
self.send_header('Expires', '0')
Challenge 3: NetworkManager Conflicts
Problem: Modern Raspberry Pi OS uses NetworkManager, which tries to manage wlan0 and conflicts with hostapd.
Solution: Configure NetworkManager to ignore the WiFi interface in AP mode:
# Create unmanaged configuration
sudo tee /etc/NetworkManager/conf.d/unmanaged.conf > /dev/null <<EOF
[keyfile]
unmanaged-devices=interface-name:wlan0
EOF

sudo systemctl reload NetworkManager
Challenge 4: Simultaneous AP and Scanning
Problem: Can't run AP mode and scan for networks simultaneously on the same adapter.
Solution: The system temporarily pauses AP functionality during scans (brief interruption), or uses a second WiFi adapter if available.
Security Considerations
Captive portals are powerful but come with security implications:
The Risks
- Traffic Visibility: Captive portals can see all unencrypted HTTP traffic
- DNS Hijacking: The same technique could be abused for phishing attacks
- Man-in-the-Middle: Malicious portals could intercept sensitive data
- User Trust: People often enter credentials on captive portals without verification
Why HTTPS Matters
This is exactly why HTTPS and certificate pinning are crucial:
- HTTPS prevents traffic interception
- Certificate validation stops fake portals
- HSTS forces HTTPS even when user types
http:// - Apps with certificate pinning won't work through portals
Best Practices
For responsible captive portal implementation:
- Minimize data collection: Only collect what's necessary
- Clear privacy policy: Tell users what you're doing
- Open source: Transparency builds trust
- No credential storage: Don't store WiFi passwords unnecessarily
- Secure the portal: Use strong passwords if auth is required
- Update regularly: Keep system packages current
Try It Yourself
Want to build your own captive portal? Here's how to get started.
Hardware Requirements
- Raspberry Pi 3 or 4 (built-in WiFi)
- MicroSD card (8GB minimum)
- Power supply
- Optional: Ethernet cable for initial setup
Quick Start
# Clone the repository
git clone https://github.com/JanithaB/rpi-wifi-provisioner.git
cd rpi-wifi-provisioner

# Run installation (requires sudo)
sudo python3 setup.py

# Switch to Access Point mode
sudo /usr/local/bin/switch-to-ap.sh
That's it! The Pi will now broadcast "RPi-Setup" WiFi network.
What You'll Learn
Building and experimenting with this project teaches:
- Network service configuration - hostapd, dnsmasq, iptables
- DNS and DHCP - How devices get addresses and resolve names
- NAT and routing - Traffic redirection and forwarding
- HTTP protocol internals - Headers, status codes, redirects
- Cross-platform compatibility - OS-specific behaviors
- Python web servers - Building HTTP services from scratch
- Linux system administration - Service management, permissions
The Bigger Picture
Captive portals are everywhere, yet most people never think about how they work. Understanding them reveals the elegant interplay between DNS, HTTP, and operating system features that creates a seamless user experience.
This technology also highlights important security principles:
- Why we need HTTPS
- How DNS can be manipulated
- The importance of certificate validation
- Why users should be cautious on public WiFi
Future Enhancements
The project is open source and ready for improvements:
- Authentication system - Add login/password protection
- Multiple profiles - Save and quick-switch between networks
- Better UI - Real-time connection status, signal strength
- Automatic fallback - Return to AP mode if connection fails
- 5GHz support - Use 802.11ac for better performance
- Web management - Configure portal settings through web UI
- Analytics dashboard - Monitor connected devices and usage
- Email notifications - Alert when connections succeed/fail
Conclusion
Captive portals are a perfect example of how simple concepts—DNS redirection and HTTP status codes—can create sophisticated user experiences. By understanding how they work, we gain insight into both network protocols and security considerations.
Whether you're building IoT devices, setting up guest networks, or just curious about the technology you encounter daily, captive portals offer a fascinating glimpse into the infrastructure that makes our connected world possible.
Try the project: github.com/JanithaB/rpi-wifi-provisioner
Got questions, improvements, or interesting use cases? Open an issue or submit a pull request. Let's build better captive portals together!
About the Project: This is an open-source WiFi provisioning system for Raspberry Pi, designed for IoT device setup, headless configuration, and educational purposes. It demonstrates captive portal technology, network programming, and Linux system administration in a practical, hands-on way.
Have you built something with captive portals? Share your experience in the comments below!